
Everyone is free to construct The Project Amplifier as he/she likes, but maybe it helps when I tell how I did it. The next part in two weeks will reveal the details of how to order the special transformers and how the project will proceed.
I used a 19” 1HU steel case, 24 cm deep. I turned the case upside down and made the holes for valves and transformers and fuses and switches in the bottom plate. See for more details the numbers 1 and 2 of the project description, while the photo in number 4 gives an overview of the total internal wiring and component placement.
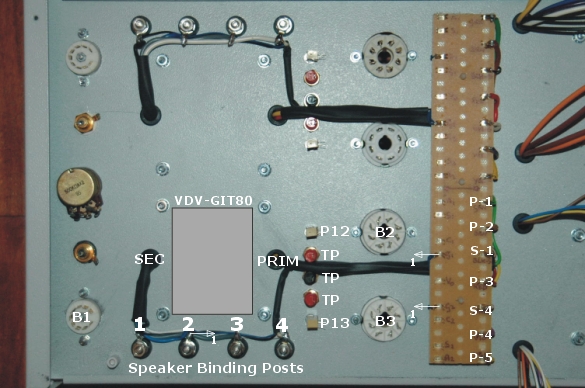
The first to do is to wire the output transformer. The primary wires go to the right side of the amplifier wire board, while the secondary wires first go the loudspeaker binding posts and from there (S-1 and S-4) also to the wire board.
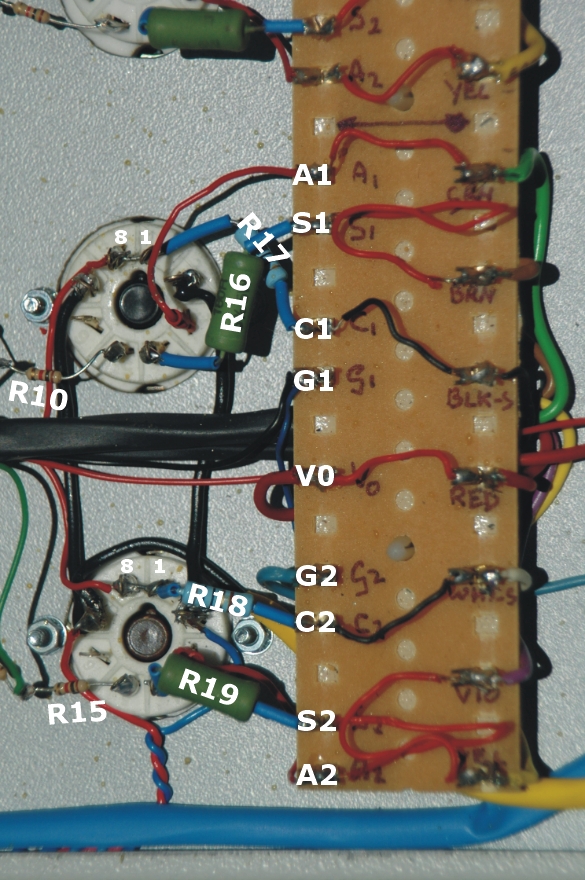
Next the valves B2 and B3 with their components can be wired and connected to the amplifier wire board. The photo shows an example of how to wire this board for one of the 20 amps that you can build (see the last figure in number 7).
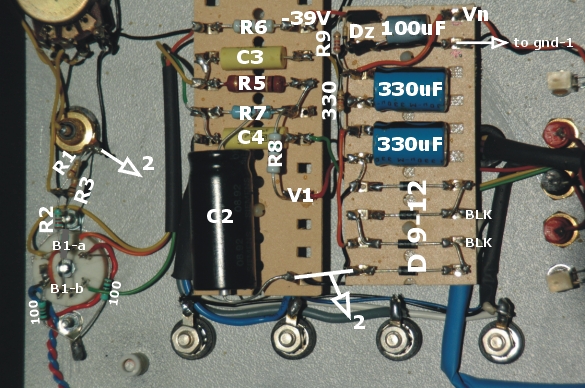
What happens around valve B1 is pictured in the next photo. Also the rectifying and buffering of the negative voltage Vn is dealt with.
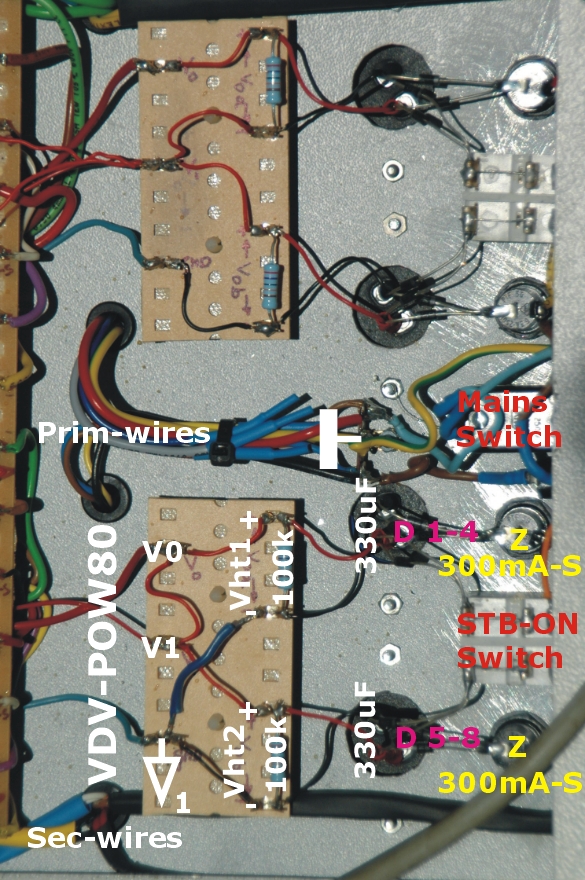
The next picture shows the high voltage supply and its wiring board.
When the photo’s appear too small on your screen, click on them and print them full page for better reading.
More news to follow soon!